1.Select a tool to draw your bounding box
I use labelImg for my purpose, easy to install and use on windows and ubuntu.
2.Convert the xml files generated by labelImg to lst format
I write some small classes to perform the conversion task, you can find them on github, if you cannot compile it, please open an issue at github.You don't need opencv and mxnet for this task after all.
3.Convert lst file to rec format
Follow the instructions at here, study how to use im2rec.py should be enough.
4. Adjust the train_yolo3.py, make it able to read file with rec format
I do this part for you already, you can download the script(train_yolo3_custom.py) from github. Before you use that, you will need to
- Copy voc_detection.py on github
- Change the file name to voc_detection_2.py
- Move it to the folder of gluoncv.utils.metrics(mine is C:\my_folder\Anaconda3\Lib\site-packages\gluoncv\utils\metrics)
- Change the codes from
from gluoncv.utils.metrics.voc_detection import VOC07MApMetrictofrom gluoncv.utils.metrics.voc_detection_2 import VOC07MApMetric
from gluoncv.utils.metrics.voc_detection_2 to import VOC07MApMetric gluoncv.utils.metrics.voc_detection import VOC07MApMetric You can prefer to install nightly release too if you want to save some troubles.
I add a few command line options in this script, they are
--train_dataset : Location of the rec file for training
--validate_dataset: Location of the rec file validate
--pretrained: If you enter this, it will use the pretrained weights of coco dataset, else only use the pretrained weights of imageNet.
--classes_list : Location of the file with the name of classes. Every line present one class, each class should match with their own id. Example :
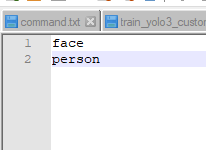 |
| pic00 |
ID of face is 0 so it is put at line 0, ID of person is 1 so it is put at line 1
Example : python train_yolo3_custom.py --epochs 20 --lr 0.0001 --train_dataset face_person.rec --validate_dataset face_person.rec --classes_list face_person_list.txt --batch-size 3 --val-interval 5 --mixup
6.Tips
1. If you do not enter --no-random-shape, you better make your learning rate lower(ex : 0.0001 instead of 0.001), else it is very easy to explode(loss become nan).
2. Not every dataset works better with random-shape, run a few epoch(ex : 5) with smaller data(ex , 300~400 images) to find out which parameters works well.
3. Enable random-shape will eat much more ram, without it I can set my batch-size as 8, with it I could only set my batch-size as 3.
7. Measure performance
In order to measure the performance, we need a test set,unfortunately there do not exist a test set which designed for human and face detection, therefore I pick two data sets to measure the performance of the trained model. FDDB for face detection(the label of FDDB is more like head rather than face), Pascal Voc for human detection. You can find the validate_yolo3.py at github.
The model I used train with 40 epoch, the mAP of this on model on the training set is close to 0.9. Both of the experiments are based on IOU = 0.5.
7.1 Performance of face detection
mAP close to 1.0 when IOU is 0.5, this looks too good for real, let us check the inference results by our eyes to find out what is happening. Following images are inference with input-shape as 320 with the model trained with 40 epochs.
 |
| pic01(2002/08/11/big/img_534.jpg) |
 |
| pic02(2002/08/11/big/img_558.jpg) |
 |
| pic03(2002/08/11/big/img_570.jpg) |
 |
| pic04(2002/08/11/big/img_58.jpg) |
 |
| pic05(2002/08/11/big/img_726.jpg) |
 |
| pic06(2002/08/11/big/img_752.jpg) |
 |
| pic07(2002/08/11/big/img_478.jpg) |
 |
| pic08(2002/08/11/big/img_492.jpg) |
 |
| pic09(2002/08/11/big/img_496.jpg) |
7.2 Performance of person detection
Unlike face detector, mAP of person detector only got 0.583mAP on the images listed by person_val.txt(I only apply on the images contain person), there are still a big room to improve the accuracy.
Adding more data may improve the performance since this test results tell us this model got high variance, in order to find out what kind of data we should add, one of the solution is study the mis-classify or the person cannot detected by eyes, then write down the reasons.
 |
| pic10(2008_000003.jpg) |
 |
| pic11(2008_000032.jpg) |
 |
| pic12(2008_000051.jpg) |
 |
| pic13(2008_000082.jpg) |
 |
| pic14(2008_000138.jpg) |
 |
| pic15 |
8. Model and data
You can find the model and data at mega. I do not put the data with images but the annotations only, you need to download the images by yourself(since I worry this may have legal issues if I publish the data). Not only added the bounding boxes for person, I also adjust the bounding boxes of faces a lot, original bounding boxes provided by kaggle are more like designed for "head detector" rather than "face detector".
9. Conclusion
This detector got a lot of space to improve, especially the mAP of human, but it will take a lot of times to do it so I decide to stop at here. My annotations of the humans, you can find a lot of them are overlap with other person a lot, bounding boxes without overlap with the person may help the models detect more persons.
You can use the annotations and model as your free will, do me a favor by reference this site if you do use them, thanks.
The source codes can find at github.